It’s always a good idea to do a “strength test” at the beginning of any fitness program so that you know where you are starting and so you can track your progress! Test yourself at four exercises: squat, mountain climber, push-up, and plank (see videos below).
Squats, mountain climbers, and push-ups: count how many you can do within one minute. Set the stopwatch on your phone or keep track on a watch or clock for sixty seconds while counting how many squats, mountain climbers, and push-ups you can do within that time. Enter the total in the space provided in your Healthy Healing book.
For plank:measure how long you can hold your plank. Hold the pose for as long as you can (stop the timer if your form becomes compromised) and enter the time in the space provided in your copy of Healthy Healing.
Repeat this fitness test after twelve weeks of Healthy Healing workouts to see how much stronger you have become!
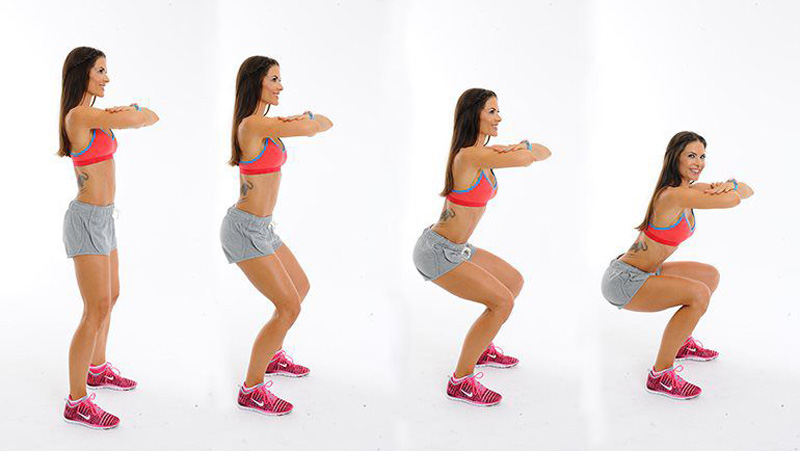
Air Squat
Starting Position: Begin standing with your feet slightly wider than hip-width, with the toes turned slightly outwards with your hands by your sides so the palms facing inwards. Pull the shoulders down and back.
Stiffen your core and abdominal muscles (“bracing”) to stabilize your spine. Hold your chest up and out, tilt your head slightly up, shift your weight back into your heels while pushing your hips towards the wall behind you.
Downward Phase: First shift your hips backwards then downwards to create a hinge-like movement at your hips and knees simultaneously. As you lower your hips the knees will then start to shift forward slowly, but try to control the amount of forward translation (movement) of the tibia (shinbone). Maintain tension in the core muscles (continue bracing) and attempt to keep your back flat.
Continue to lower yourself until your thighs are parallel or almost parallel with the floor, until your heels begin to lift off the floor, or until your torso begins to round or flex forward. Monitor your feet, ankles and knees, ensuring that the feet don’t move, the ankles do not collapse in or out and the knees remain aligned over the second toe.
Upward Phase: While maintaining your back, chest and head-up position, exhale and extend the hips and knees by pushing your feet into the floor through your heels. The hips and torso need to rise together while keeping the heels flat on the floor and knees aligned over the second toe. Continue extending until you reach your starting position.
Think about inhaling on the way down and exhaling while exerting on the way back to the initial standing position.
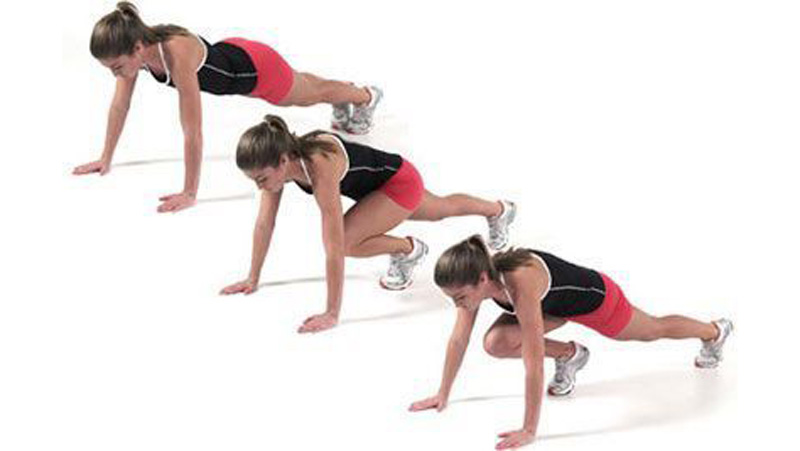
Mountain Climber
Starting Position: Kneel on an exercise mat or floor, positioning your knees and feet hip-width apart, with your feet dorsi-flexed (toes pointing towards your body). Slowly lean forward to place your hands on the floor slightly in front of your shoulders, fingers pointing forwards. Flex your left hip, bringing your left thigh to your chest, placing your left foot on the floor, heel slightly lifted and toes pointing forward. Lift your right knee off the ground, fully extending your right leg behind you, with your foot in dorsi flexion, (toes pointing towards your shins, heel up). Stiffen your abdominal muscles (“brace”) to stabilize your spine, then depress and retract your scapulae (pull your shoulders down and back).
Keeping your hands firmly on the ground, abs engaged and shoulder strong, simultaneously switch leg positions. Both feet leave the ground as your drive your right knee forward and extend your left leg back. Now your left leg is fully extending behind you and your right hip is flexed with your right foot on the floor.
Exercise Variation: If you have limited range of motion in the hips, place hands on a step, platform, or bench.
TIP: Keep your weight evenly distributed on both legs. Do not shift all your weight forward into your front foot.
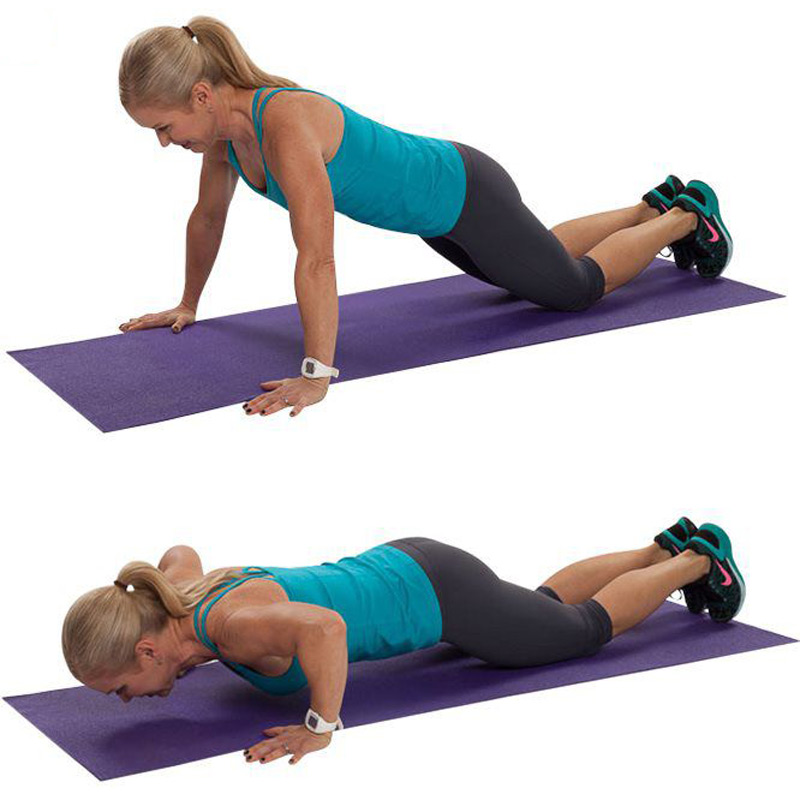
Push Up
Starting Position: Kneel on an exercise mat or floor and bring your feet together behind you.
Slowly bend forward to place your palms flat on the mat, positioning your hands shoulder-width apart with your fingers facing forward or turned slightly inward. Slowly shift your weight forward until your shoulders are positioned directly over your hands. Reposition your hands as needed to allow full extension of your body without any bend at the hips or knees. Stiffen your torso by contracting your core/abdominal muscles (“bracing”), your glute and quadriceps muscles and align your head with your spine. Place your feet together with your ankles dorsiflexed (toes pointed towards your shins).
Downward Phase: Slowly lower your body towards the floor while maintaining a rigid torso and head aligned with your spine. Do not allow your low back to sag or your hips to hike upwards during this downward phase. Continue to lower yourself until your chest or chin touch the mat/floor. Allow your elbows to flare outwards during the lowering phase.
Upward Phase: Press upwards through your arms while maintaining a rigid torso and head aligned with your spine. For extra strength think about pushing the floor away from you. Do not allow your low back to sag or your hips to hike upwards. Continue pressing until the arms are fully extended at the elbows.
An alternative position is to turn your hands to face forwards and keep your your elbows close to your sides during the downward phase. This shifts the emphasis from the chest muscles onto the triceps and may reduce stresses in the shoulder joint.
TIP: Pushing through the heel and outside surface of your palm provides greater force in your press and stability to your shoulders.
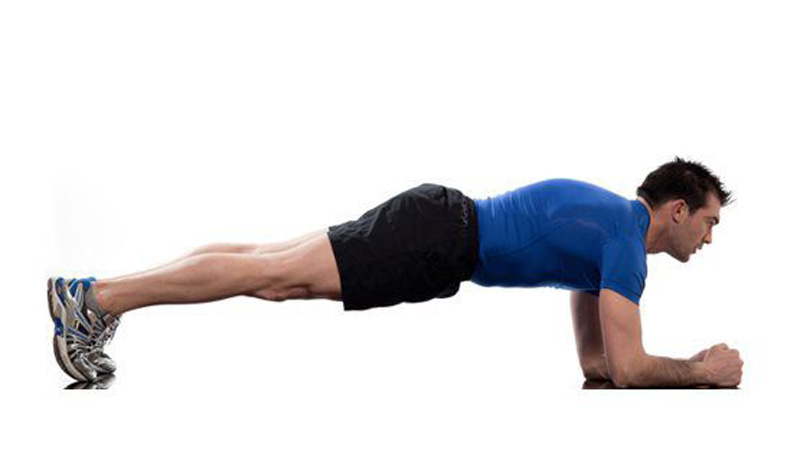
Plank
Starting Position: Lie prone (on your stomach) on an exercise mat or floor with your elbows close to your sides and directly under your shoulders, palms down and hands facing forward. Contract your quadriceps to extend your legs and dorsiflex your ankles (pull toes towards your shins). Contract your core and abdominal muscles to stiffen your torso.
Upward Phase: Slowly lift your entire torso off the floor or mat, maintaining a stiff torso and legs. Avoid any arching (sagging) in your low back, hiking (upwards) in your hips or bending in the knees. Avoid shrugging your shoulder and keep your shoulders positioned directly over your elbows with your palms facing down. Continue to breath while holding this position for a specified time (5+ seconds).
Downward Phase: While maintaining a stiff torso and extended knees, gently lower your body back towards the mat or floor before relaxing.
NOTE: If you experience any pain in the low back with this movement, stop the exercise immediately and consult with your doctor.